
Tags
Bathroom Design Port Moody, Bathroom Design Vancouver, Before and after, Derrick Holdenried, Design, DIY, Interior design, Interior Design Port Moody, Interior Design Vancouver, Lori Holdenried, Port Moody Design
When my husband and I decided it was time to renovate our main bathroom in our 1958 home our goal was to not only update its dated finishes but to fix its badly planned layout. We believe the bathroom went through a sad renovation in the seventies which was not well thought out or done with quality workmanship. How bad could it be you might ask? Well, you could literally sit on the loo and do a load of laundry at the same time lol. So we knew the stacking washer dryer had to be removed to allow for more space and a better layout. There was another washer and dryer in our basement so removing them from the bathroom was not a big inconvenience. The previous reno had also taken space from the adjacent bedroom closet making it very small and almost unusable.

Bathroom Before

Here was my list of wishes for the bathroom:
- Remove washer and dryer
- Reclaim space taken from the bedroom closet
- Large spacious walk-in shower
- A larger window for more light
- Open up the layout to expand the space visually

With this new layout our goal was to:
- Relocate the loo to allow for a large 7 feet by 3 feet walk-in shower.
- Brighten the bathroom with a larger centered window
- Open up the bathroom by placing the longest fixture (the shower) on the back wall with a frameless glass enclosure to allow light from the window to fill the space.
- Use finishes that would provide for a bright and dramatic space.
Can you believe this bathroom is smaller than before (but way more functional) and feels two times as big!
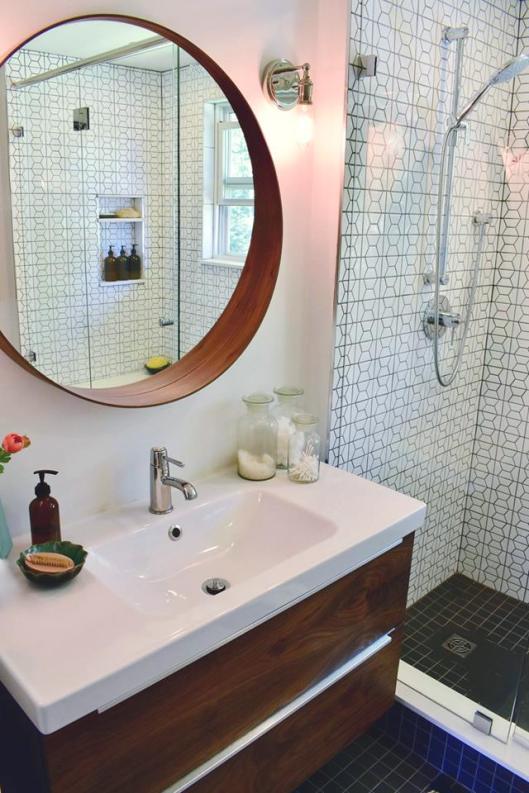
Our intent for this bathroom matches the result – dramatic, bright and airy. The hexagon wall tile is dramatic but not overpowering, the matte dark gray floor tile grounds the space which allows the hexagon tile to be the hero of the bathroom. The floating streamlined sink vanity adds to the airy feel. Its rich warm walnut veneered drawer fronts add warmth to the bathroom that could seem cold with so many hard finishes. WE LOVE IT SO MUCH.


We chose a big-box vanity which floated off the floor – thus taking up less space visually. It had gloss dark grey drawer fronts which we found didn’t add a lot of warmth or interest to the bathroom. So we took a deep breath and jumped in and researched veneering them with walnut. We also decided to change out the standard handles that came with the vanity with dramatic long chrome handles. I love the rich warm effect the walnut drawer fronts have on the space and how along with the new handles the walnut veneer took a standard big-box vanity and made it stunning!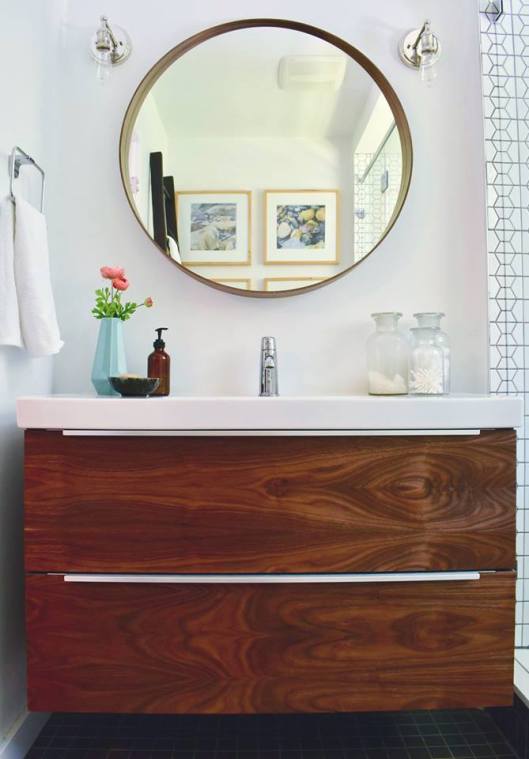


Another way we decided to add warmth to our bathroom was by using a blanket ladder as a towel rail instead of a traditional one and using large-scale nature photography. I feel they added a lot of warmth, texture, and height to a room that could feel cold with a large number of hard surfaces in a bathroom.
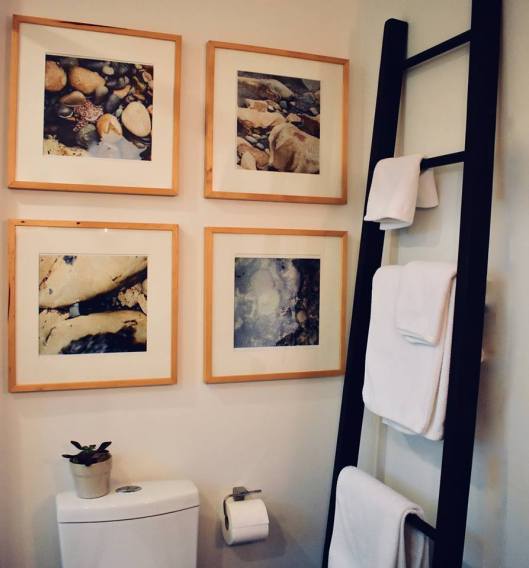
Can you believe my awesome husband made it from this blanket ladder from a sketch I drew for him? I was unable to find one that was tall enough or sturdy enough so he said he would give it a try for me 😍
Here are the details:
1. Cut down 2 cedar 8 foot long 2 x 4’s to 3″ x 7′ and eased all the edges with a sander.
2. Cut 1″ hardwood dowels to the measurements from the drawing.
3. Mark and drill 1″ holes 1″ deep in the cedar sides at measurements from the drawing.
4. Glue and clamp dowels in place overnight.
5. Stain ladder with 2 to 3 coats and let dry 24 hours.
6. Apply 2 coats of Polyurethane following directions on the label.
He must really love me ♥️

I also added warmth to our bathroom by adding warm tones through plants/flowers, vintage pottery and amber glass as accessories.


We love how our Modern Hexagon Bathroom turned out 😍 We are even more proud that we did all the work in it other than the new plumbing rough-ins and the installation of the frameless glass shower enclosure and are now looking forward to many years of long hot showers in it. Let me know if you have any questions about anything. Here is one last shot of the Before and After of our main bathroom renovation.

